Here are a Few Quick Embroidery Needle and Thread Basics
Table of Contents
- Choosing Fabric
- Embroidery Needles
- Embroidery Thread Quality
- Organizing Embroidery Thread
- Embroidery Thread Length
- Using Embroidery Thread
- Separating Embroidery Thread
- Tips
- Video
If you're just getting into embroidery you'll need to pull together supplies to create your magic. Embroidery needle and thread are certainly going to be on that list so I'll share with you my recommendations and tips to help you get started.
Choosing Fabric
Let me touch on fabric for a hot minute. You can use any fabric that isn’t too thick or too stretchy. A nice tight weave is ideal, but not so tight that your needle and thread struggle to glide through it. You can even stitch onto card stock paper, but with some limitations.
My personal favorites are the tried and true, cotton and linen which have nice weave tension. They aren’t going to stretch and warp your work, and they’re also thin enough so you can use the window method to transfer patterns onto it. Felt is also fun to work with but it has some small nuances. I would highly recommend starting off with cotton or linen.
Embroidery Needles
To most people needles are needles, but if you really examine them you'll find that there are differences from the sharpness of their points, their length, thickness, size of eye, and sometimes even the shape. These differences are designed with purpose to give your project the best result.
Some hand embroidery projects fair well with blunt needles, but for the most part, embroidery needles (aka crewel) are typically sharp with a long oval eye, and they come in different sizes. The higher the number of the needle the smaller the needle, which affects the size of the eye and needle thickness.
When selecting the size needle you want to take into consideration how many threads you'll need to pass through the eye and the weave or thickness of your fabric.
Selecting The Right Needle
- Make sure the number of threads can be accommodated by the eye so its not crammed or too loose.
- When you pass your needle and thread through make sure it doesn't leave too large of a hole. If it does try a thinner needle.
- In contrast, if you're having to put a little extra effort into getting your needle and thread to pass through your fabric it will fray your thread prematurely. You may need to reconsider your choice of fabric or needle. If your fabric is a bit on the thick side, a thin needle could be creating a hole that isn't large enough for your thread to pass through. Try a thicker needle in this case.
- Before you thread your needle check the tip for burrs on the tip. It's rare but it happens and it can snag your fabric.
I use DMC needles but I don’t pay much attention to the needle’s number. I just visually select the needle that has a nice point, length, and eye that feels comfortable to work with.
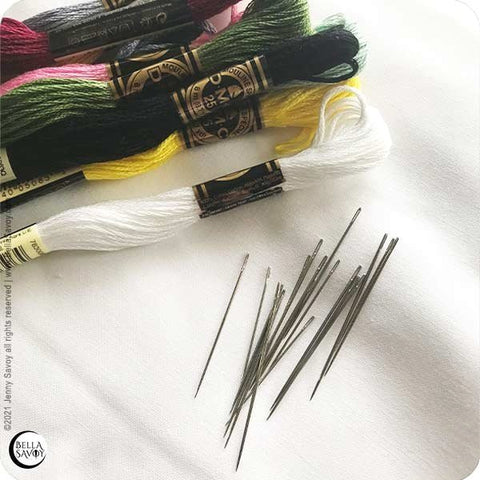
Embroidery Thread Quality
Embroidery thread is sometimes referred to as skeins or floss, and while there are a variety of threads from silk, rayon, metallic, and even wool, the 6 strand cotton thread is the most commonly used and it's what I recommend for beginner.
There's no perfect formula for choosing your needle & everyone has their own favorite, but with a little experimenting you'll find what works best for you.

Embroidery threads are pretty inexpensive and they come in a motley of colors. I started off with a package of them from Amazon which work great as you are learning the in's and out's.
Once you're hooked you'll definitely want to upgrade to a higher quality threads like DMC, which holds their shape and color better, plus they’re less likely to fray. The difference in quality is very noticeable and it's my favorite brand!
If you start off with a lower quality group of threads then be sure to also grab a few DMC threads so you can compare them.
Organizing Embroidery Thread

As you work with embroidery thread and your colorful collection grows, you'll need a way to keep everything organized. Not only will it make it easier to find colors you need but it will also minimize tangles that can easily occur.
Here are some ways to organize your embroidery threads:
- Wrap your thread around clothes pins.
- Loop your thread through holes on heavy card stock or special floss organizers.
- Wrap your floss on thick bobbins and store them all in a container grouped into similar colors.
My favorite way to keep my floss organized is the latter, on thick bobbins stored in a flat container with small sections.
Embroidery Thread Length
Thread can get tangled and may fray as it constantly moves through your fabric, so to manage this, you'll want to use a sensible length. There are 2 recommended lengths, depending on how you use it:
- If you thread your needle and knot one end of your thread while keeping the other loose, the recommended length is from your elbow to the tip of your fingers. I always seem to have issues with my needle falling off the thread so it’s not my favorite way to stitch, and I only use this method when the pattern requires an odd number of threads.
- If you fold your thread and and tie the ends together, then cut the thread about a full arms length. When folded it should be about a half arms length. This is the way I do it because my needle never falls out!
Using Embroidery Thread
Before you thread your needle you’ll need to decide if you want to work with the ends of the thread tied together or if one end will hang loosely without a not.
Usually it doesn’t matter and it’s more of a preference thing, but there are some cases where you may want to tie the ends together so your needle and thread move smoothly in and out of your fabric.
Let's say a pattern calls for 6 strands of thread.

If you use a full 6 strands of thread you’ll be leaving one end of the needle without a knot (the 1st needle in the photo) This means the tail would need to be folded over to keep the thread on the needle. When you start stitching you’ll actually have to push 12 strands through your fabric along with the width of the eye. It can be so bulky that you won’t be able to easily pull your needle and thread through.
But, if you were to use 3 strands, they can be folded in half then tied together on the ends to make it 6 strands.(the 2nd needle in the photo). You’ll only need to push 6 strands with the needle’s eye which is much easier than pushing 12 strands through.
Can you see the difference at the eye of the needles?
Note: the number of strands in a pattern is equal to the number of strands that will make up the stitch, not the actual number of strands you'll pull from your 6 stranded thread. So if the pattern says to use 4 strands you can:
- Pull 4 strands from your thread, tie one end, and keep the other end loose.
OR
- Pull 2 strands from your thread, fold it in half, and tie the ends together to get 4 strands.
Separating Embroidery Thread
Embroidery thread usually comes with 6 strands and there’s a trick to separating them so you don’t end up with a tangled mess.
I’ll show you as I separate 2 strands from the rest.
To separate 2 strands from the rest, pull 2 strands about an inch or so away from the rest so your thread resembles the letter ‘Y’, then pinch the thread at the base where they are starting to separate with two fingers. Use your other hand to gently and slowly pull the 2 strands out.

Take your time. If you go too quickly you can end up with a tangled mess instead.
The thread will curl up below your fingers as you pull your strands out but it’s easy to uncurl once you’re done. That's all there is to it!

Tips
Here are a few helpful tips related to embroidery threads to end this embroidery tutorial.
- If you’re planning to fold the thread in half on the needle and tie the ends together it’s better to start in the middle. Separate strands down one end of your thread, then return to the middle and separate strands down the other end. You can see me do this in the 2nd half of my video tutorial below.
- Always cut the tail behind your knot to avoid it being pulled through to the top when you push a needle up near it.
- Make sure that you leave enough thread to secure it on the back when the thread gets short. I’m guilty of pushing this as far as I can.
- If you plan to wash your embroidery, do a thread color test to make sure your color won't bleed onto your fabric.
- Be in the habit of keeping your threads clean and organized. You'll always know where your colors are and whether you have plenty or need to restock.
- A flat box is a great way to keep your supplies in one place for your current project.
- Use either a magnetic needle holder or a piece of fabric to keep your needles so you don’t lose them as you work. I always know how many needles I’m using so I know if I need to be on the lookout for a runaway needle.
Be sure to take a peek at my other blog posts for embroidery beginners.