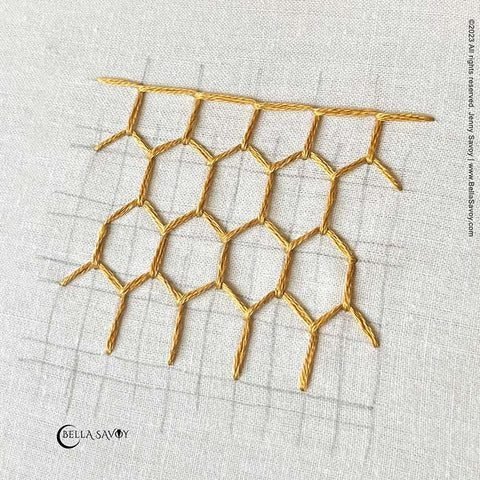
🖤 You’ll love this honeycomb stitch tutorial! The honeycomb stitch is an easy and fun embroidery stitch that starts with the blanket stitch, creating beautiful geometric cells that resemble the structure of a honeycomb. Once you master it, this stitch adds a lovely textured effect to your designs, and it’s simpler than it might first appear. With a little practice, you’ll be able to stitch neat and uniform hexagons in no time.
I’ve always had a special fondness for bumble bees. Their fuzzy bodies and gentle buzzing make them such fascinating creatures, and they’re essential for keeping gardens healthy. Of course, bees are also famous for their honeycombs, which is where this stitch gets its inspiration. I’m dedicating this honeycomb stitch tutorial to those hardworking little bees!
The honeycomb stitch falls somewhere between a beginner’s and intermediate-level technique. It builds upon the blanket stitch, which makes it easier to learn once you’re familiar with that foundational stitch. However, you’ll need a bit of practice to get the cells looking neat and consistent, but it’s definitely manageable! With each new cell, you’ll find yourself getting faster and more precise.
This stitch is perfect for adding texture and dimension to your designs, whether you’re stitching flowers, borders, or abstract patterns. Plus, embroidery is a wonderful self-care activity that allows you to slow down and unwind while creating something beautiful. Ready to try it out? Let’s dive in!
Table of Contents
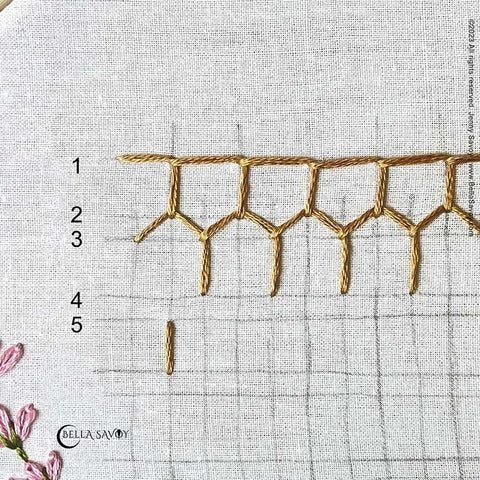
Ready to learn the honeycomb stitch? To make this embroidery stitch tutorial a bit easier to explain I’ve drawn guidelines and numbered the lines.
Honeycomb Stitch Steps
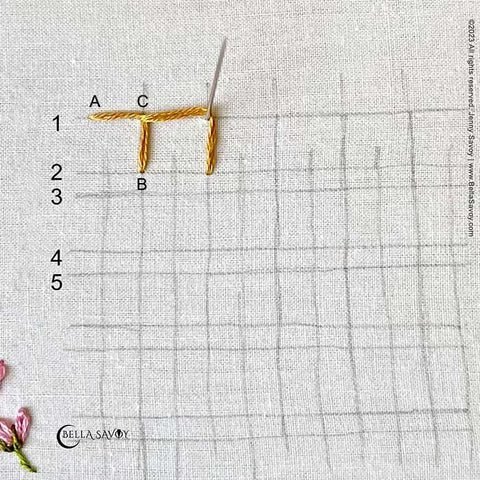
Start with the blanket stitch on line 1. Here’s a quick refresher if you need it (or head to my blanket stitch tutorial).
-
Simply come up at A and return to the back at an angle, at B.
-
Keep the stitch a little loose and come up at C, under the thread.
-
Then pull it tight to form a right angle.
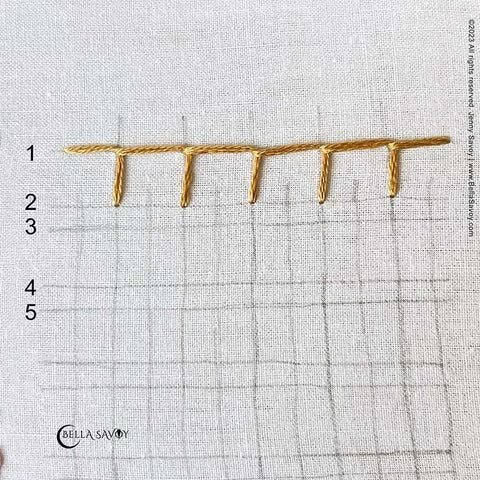
Repeat steps to create a row. If you prefer not to have a line across the top of your honeycomb stitch you can opt to create vertical straight stitches instead.
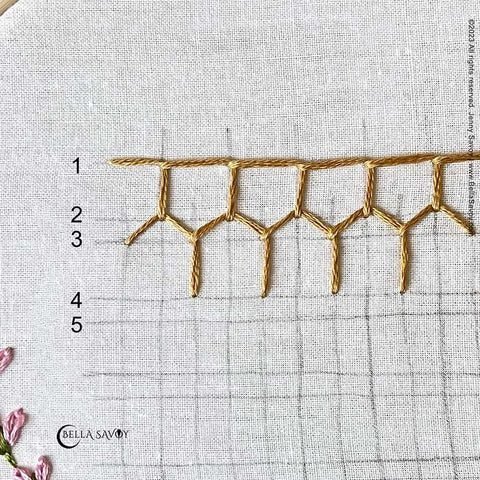
Come up on line 3. This should start around halfway in from where the blanket stitch begins. Slide your needle under the first vertical stitch and pull through.

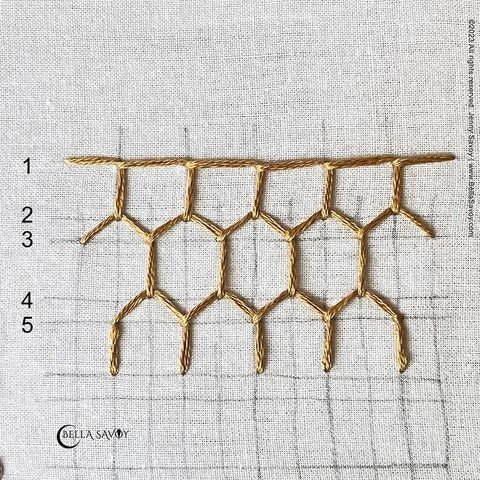
Return to the back on line 4, about halfway in from the beginning of the 2nd blanket stitch. Keep the thread slightly loose and come back up directly above, on line 3. Pull through.

Repeat these steps to finish another row.
If you want to start your row with a vertical line, just add a straight stitch before adding the honeycomb stitch steps just covered.
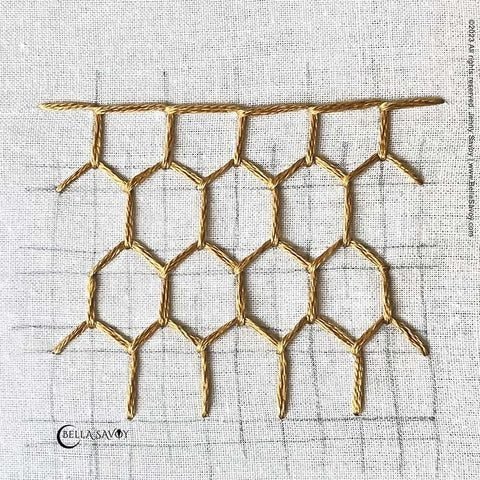
Repeat the steps.
Isn’t that lovely? While it’s definitely possible to create a similar pattern of cells using just straight stitches, it would take much longer, and you might lose some of the intricate details that make the honeycomb stitch so visually appealing. I find that this method helps me keep the steps organized, eliminating the guesswork of where each corner should be, and ensuring the cells are consistent and neat.
The beauty of this technique lies in its simplicity and efficiency, allowing you to achieve a polished look without too much effort.
I hope this honeycomb stitch tutorial inspires you to add a touch of texture to your next embroidery project. With a little practice, you’ll be able to create stunning designs that feature these beautiful hexagonal shapes. Don’t forget to take your time, relax, and enjoy the process—embroidery is a perfect way to practice self-care while creating something beautiful!
Honeycomb Stitch Tutorial
Here’s the video tutorial! Don’t forget to visit my Youtube channel and subscribe. Enjoy!