🖤 Learn how to embroider these 5 easy feather stitch variations in this embroidery stitch tutorial and create things like stems, vines, coral, & textures. Follow these simple step-by-step tutorials or skip to the video tutorial.
I love the feather stitch and the variations it has to offer. They’re beautiful on their own and can create lovely patterns for your embroidery projects.
I’ll show you how to create the basic feather stitch along parallel lines for the sake of simplicity but you can make them more organic by using curvy guidelines or even changing up the length of some of the ‘V’ shapes. Create vines, foliage, and coral with the feather stitch. You can incorporate other stitches like the lazy daisy stitch, french knot, and even a whip stitch. There’s a lot of room to be creative!
Table of Contents
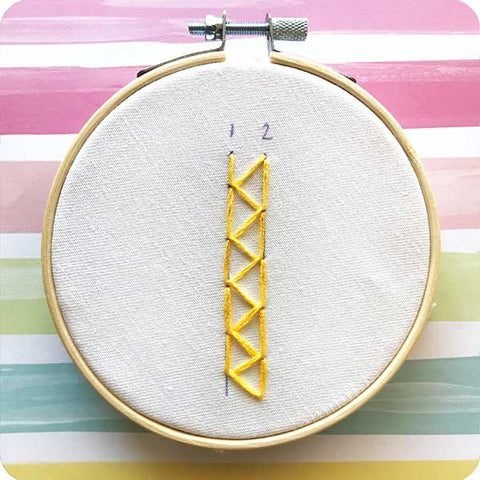
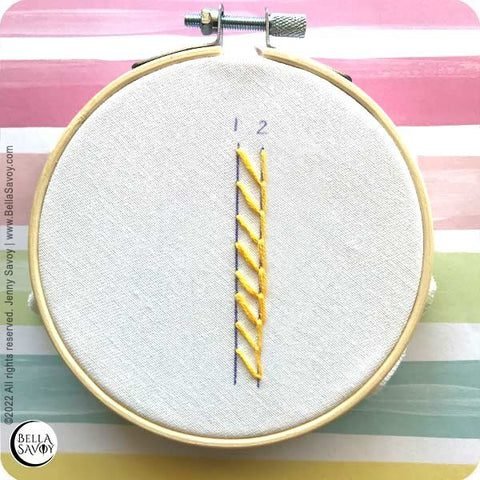
Basic Feather Stitch
It starts off like the fly stitch which uses the basic ‘V’ shape and ends up looking like a bunch of ‘V’s that stagger from side to side.
-
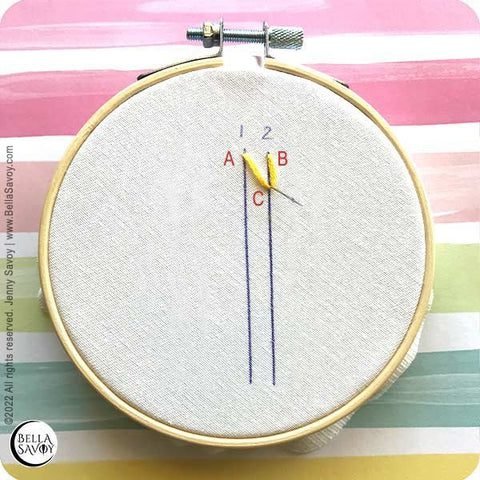
Create 4 parallel guide lines.
-
Make a loose stitch from the top of line 2 and 4 (A to B).
-
Come up at C, over the loop.
-
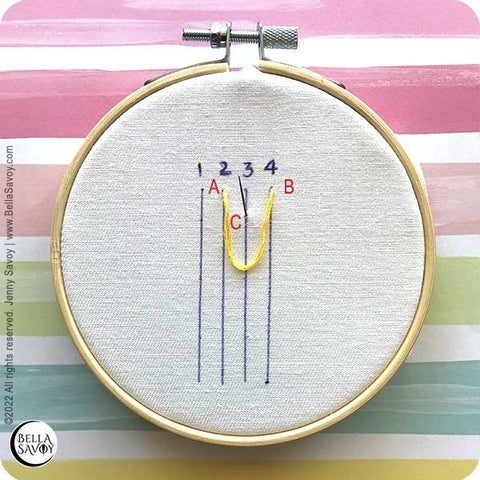
Pull thread through to form a ‘V’.
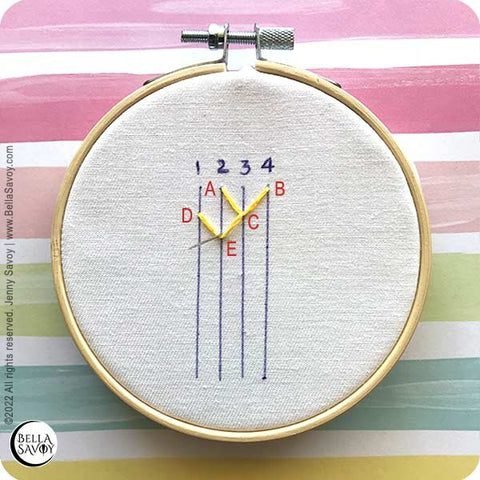
Repeat these steps to create another ‘V’ on the left side.
-
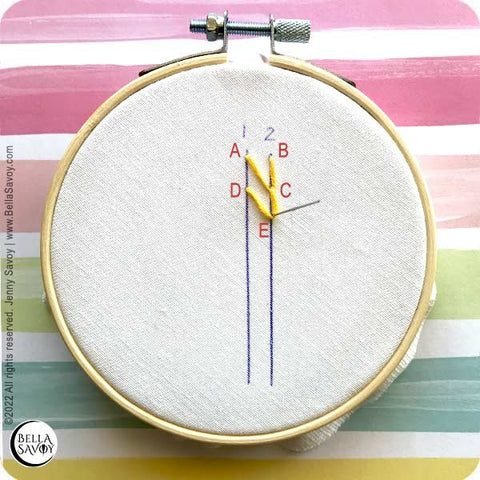
Return to the back directly left of C, on line 1 (D) to form a loose loop.
-
Come up at E, over the loop and pull through to form another ‘V’.
Repeat your steps on the right, then left, and continue until you’re happy with the length.
When you’ve reached the end, tie down by creating a tiny stitch directly below your last ‘v’.

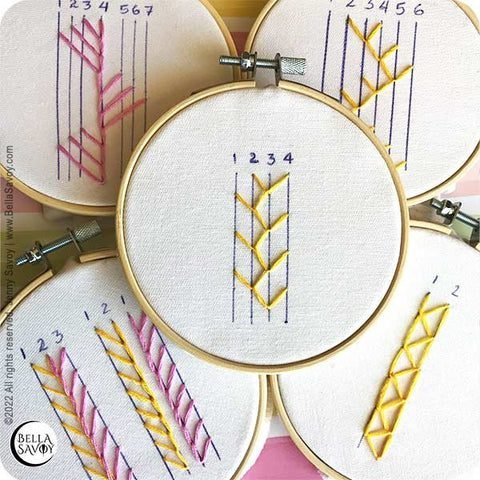
5 Easy Feather Stitch Variations
Closed Feather Stitch
With the closed feather stitch variation, the ‘V’ shapes still go from side to side, just like in the basic variation, only this time it’s at an angle.
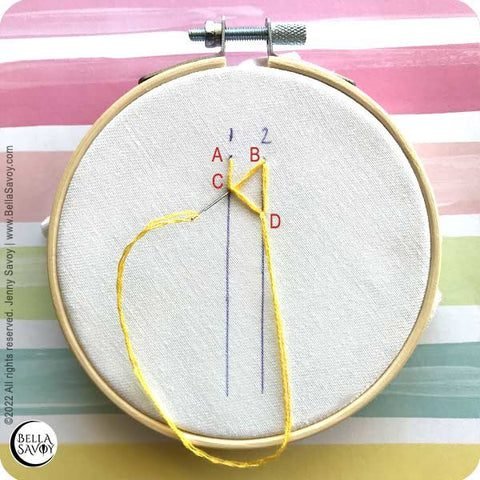
Draw 2 parallel lines and create your first ‘V’.
-
Create a loose loop at the top of lines 1 and 2 (A to B).
-
Come up at C, over the loop and pull through to form the first ‘V’ which will look angled.
-
To repeat on the other side, make a loose loop from C to B.

Come up over your loop on line 2 at D. Then pull your thread through. Repeat steps.
Straight Feather Stitch
In this feather stitch variation, the ‘V’ shapes are stacked on top of each other with one side of the ‘V’ being straight and the other angled.
-
Draw 2 parallel guidelines
-
Then come up at A, then down at B to form a loose loop.
-
Come up at C, over the loop and pull through to form angled ‘V’.
-
Return to the back at line 1, next to C (at D) and form a loose loop.
-
Come up over the loop at E and pull through.
Repeat these steps until you’re happy with the length then add a small tie stitch at the very bottom to hold that last ‘V’ in place.
You can also create this variation going in the other direction using the same steps. You can also combine them by placing them directly next to each other which gives it the illusion the the center is braided.
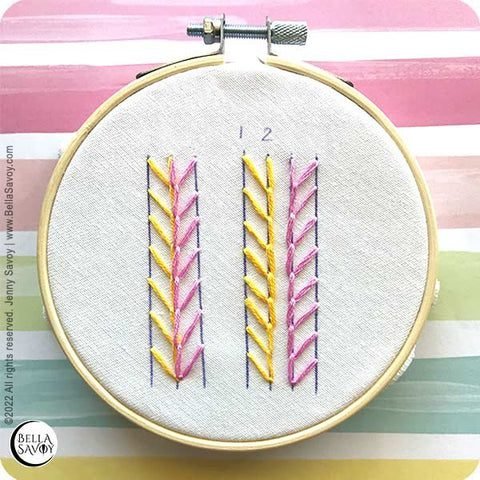
Maidenhair
Draw 7 parallel lines. Line 4 will be the center line that each ‘V’ extends from.
-
Come up at the top of line 3 (at A) and return to the back at B to form a loose loop.
-
Come up over the loop at C and pull through.
-
Return to the back at line 2 (D) and form a loose loop.
-
Come up at E, over the loop and pull through.

-
Return to the back at F on line 1 to form a loose loop.
-
Come up at G, over the loop and pull through.
Now repeat these steps on the other side and repeat until you’re happy.
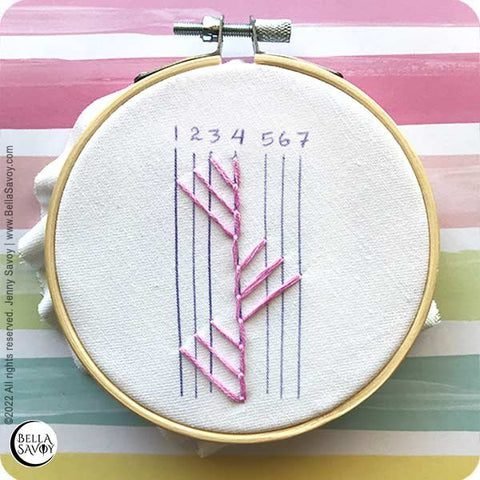
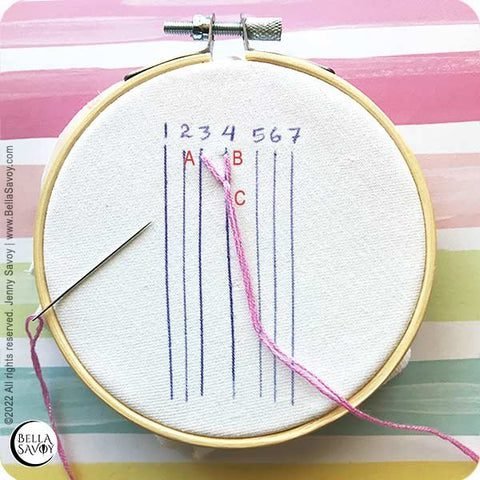
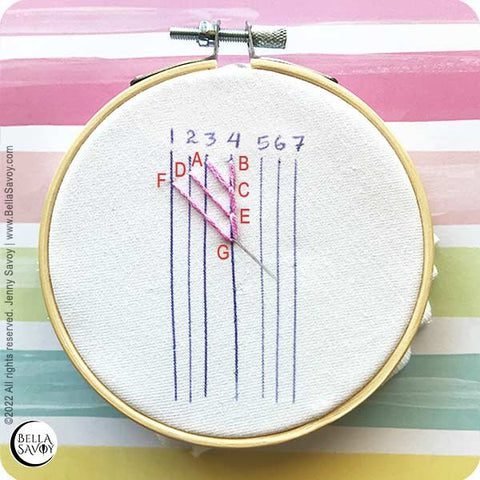
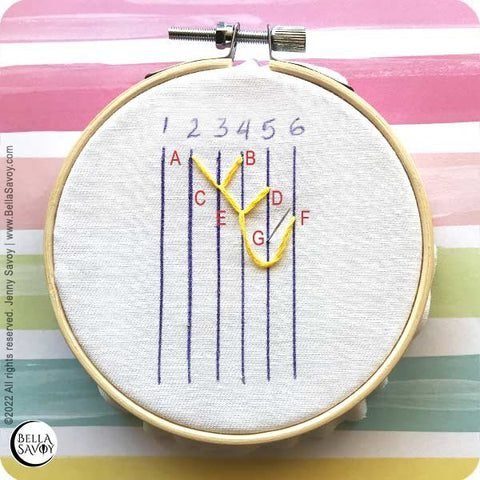
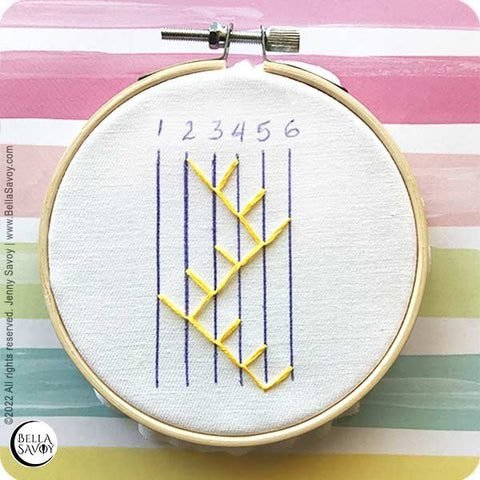
Double Feather Stitch
The double feather stitch is created just like the basic feather stitch except you’ll create three ‘V’ shapes for each direction.
-
Make 6 parallel guide lines.
-
Come up at line 2 (A) then return to the back at line 4 (at B) to form a loose loop.
-
Come up at C, above your loose thread & pull through to form the first ‘V’.
-
Return to the back at D (on line 5) to form a loose loop.
-
Then come up at E, above your loose thread, and pull your thread through.
-
And do this one more time to the right. Return to the back at F to form a loose loop, then pull your thread through at G.
Now repeat these steps to create 3 more V’s, only this time towards the left.
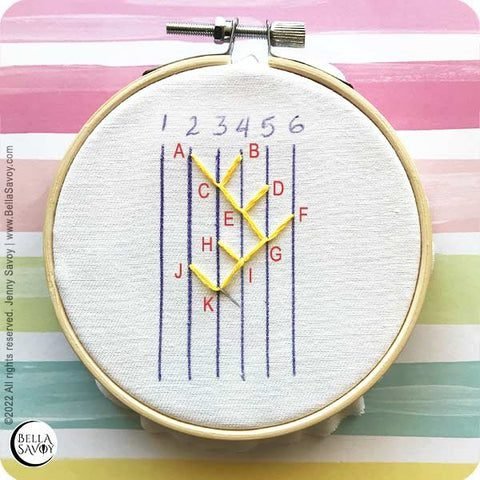
Continue in this manner until you’re happy, then tie down your last ‘V’ with a small stitch at the bottom.
Video Tutorial: 5 Feather Stitch Variations
Be sure to watch the video tutorial if there are any parts that weren’t clear. Enjoy!