🖤 Learn how to create the classic fishbone pattern with the fishbone stitch in this step-by-step tutorial. This easy embroidery stitch is perfect for filling in shapes, creating design elements, and adding some visual interest to your work.
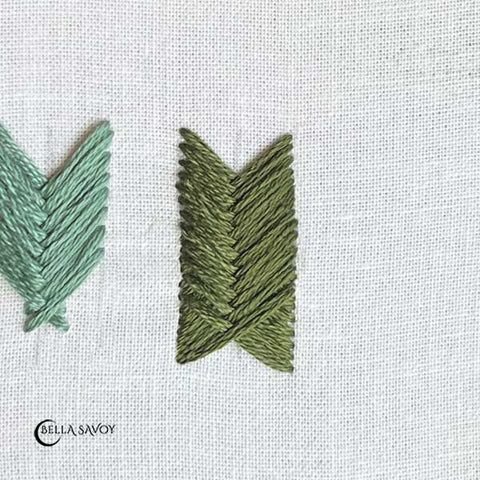
The fishbone stitch is easy to learn. To break it down, it’s essentially a series of stacked “X” shapes. You can keep the width of the “X” consistent, or you can play around with varying widths—making it perfect for shapes like leaves. It’s a fun stitch to incorporate into your projects!
The fishbone stitch is versatile, too. You can use it as a closed-fill, covering the fabric completely, or opt for an open-fill where the stitches are more spaced out, leaving some of the fabric exposed. Both methods can add a unique texture and depth to your embroidery.
Now that you’ve gotten to know the fishbone stitch a little better, grab your tea or coffee, settle into your favorite spot, and let’s dive into this relaxing stitch tutorial.
Table of Contents
Flat Fishbone Stitch
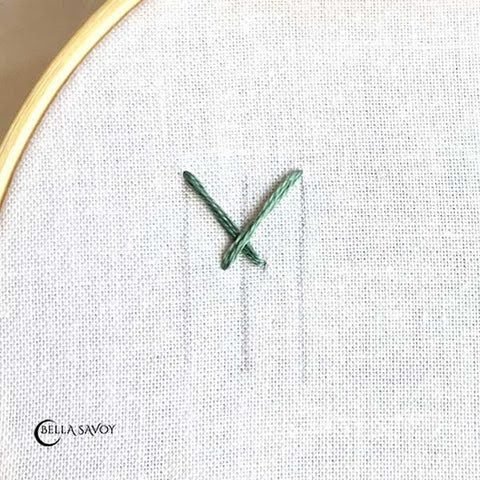
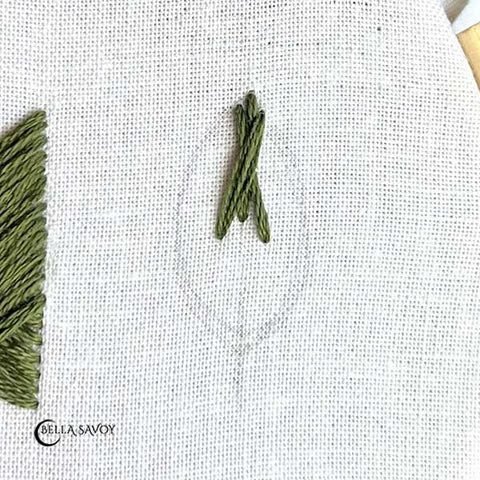
Start by drawing three parallel vertical lines on your fabric. These will serve as guidelines for your stitching.
Next, make a straight stitch from the top left, crossing over the center at a slight angle. When you reach the center, return to the back of the fabric near the center line to anchor your stitch.
Now, repeat the same steps on the right side, following the same angle as on the left. This will create a mirror image of the stitch, forming an ‘X’ with a narrow bottom.
By following these simple steps, you’ll start to see the foundation of the fishbone stitch taking shape. Keep your lines and stitches consistent to achieve a neat and uniform effect.
From here, repeat the steps and stack them directly below each other.
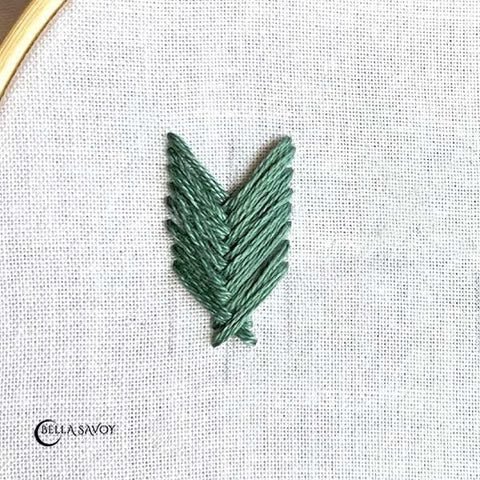
Raised Fishbone Stitch
This variation adds a little extra dimension, making it plumper and more textured. The raised version is perfect for adding depth and a more prominent effect to your designs.
Start by drawing three vertical parallel guidelines on your fabric. These will act as your reference points and help keep your stitches even and consistent.
Next, make a straight stitch from left to right, crossing at an angle from the first guideline all the way to the third. Make sure your stitch is firm but not too tight, as you’ll want the stitch to sit up slightly from the fabric.
Once you’ve completed the first side, repeat the same process on the opposite side, ensuring that your stitches mirror each other. The result will be a raised ‘X’ pattern, adding volume and a three-dimensional look to your design. This technique is great for creating textured leaves, petals, or any shape where a raised effect would enhance the overall design.
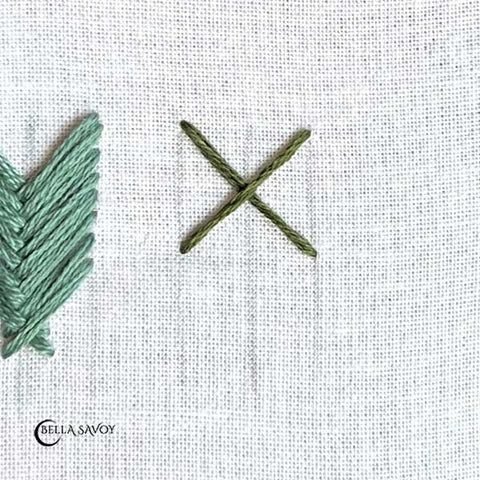
Repeat and stack each one directly below each other.
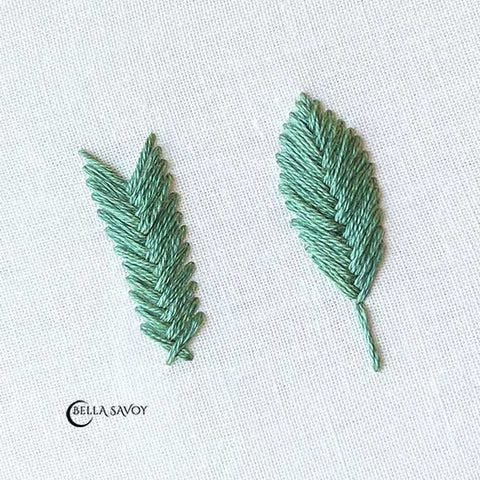
Stitching a Leaf: Closed Fill
For this technique, we’ll be using the fishbone stitch to fill a leaf shape completely, creating a smooth, solid appearance. This version of the fishbone stitch will be worked tightly, covering the fabric below it entirely. It’s perfect for adding depth and richness to your embroidery projects.
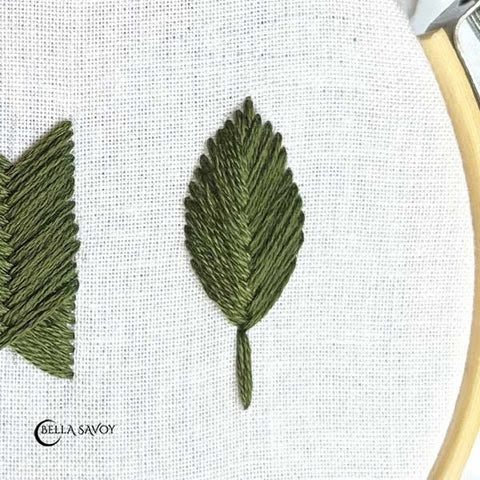
Start by drawing your desired leaf shape on your fabric as a guideline. Then, begin stitching with your fishbone stitch, working from one side of the leaf to the other. Make sure each stitch is placed closely together, keeping the stitches tight and close to fill the space completely. As you move along, alternate the direction of the stitches to mimic the veins of the leaf, creating a natural, textured effect.
By keeping your stitches evenly spaced and consistent, you’ll achieve a lovely, smooth closed-fill that gives your leaf shape a lush, full appearance. This technique is great for flowers, leaves, or any design element where you want to create a dense, solid fill with beautiful texture.
When you get to the bottom of the leaf you may run out of room to cross the stitches. That’s okay. Just taper them into a point and if you still have space along the bottom of the leaf that needs filling you can add a few simple stitches. Add a stem if you’d like.
Video: Fishbone Stitch Tutorial
Follow more embroidery stitch tutorials in my stitch library.